How To Jtag Your IBOX 2 Plus & 3 Compiled & Tested By Ferret
This guide was complied from information found on Various forums which ive put together in what i hope is a easy to understand format and then tested on my own bricked Ibox 3.
.
This will recover your box from the Blue Light condition after flashing a bootloader or image after the 17/05/2014.
A big thanks to Bazal from the ibox forum for his files, guide and help.
Thanks to psgamer for the BB3 XML files and bootloaders.
Thanks to is0-mick for original VU+.pdf
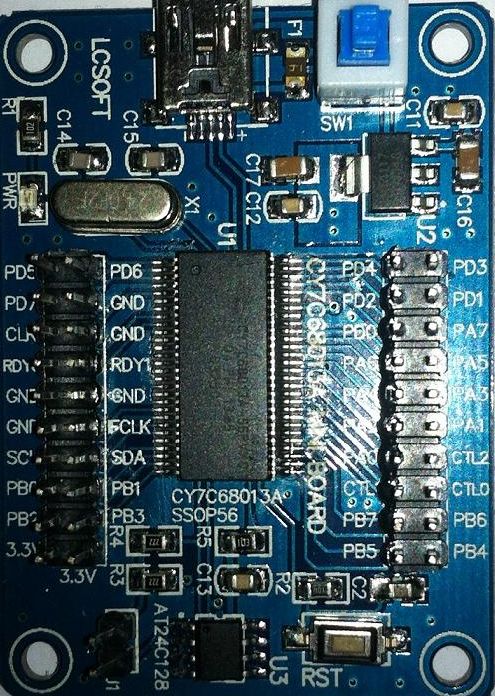
The interface we need to complete the Jtag process is a Cypress EZ-USB FX2LP CY7C68013A USB2.0 Development Board, there appears to be 2 on the market which both seem to share the same model number.
The one we nee for BB3 Compatibility is the single jumper version, the dual jumper version will not work with BB3.
First thing we need to do is strip out the mobo from the ibox to solder to the jtag points.
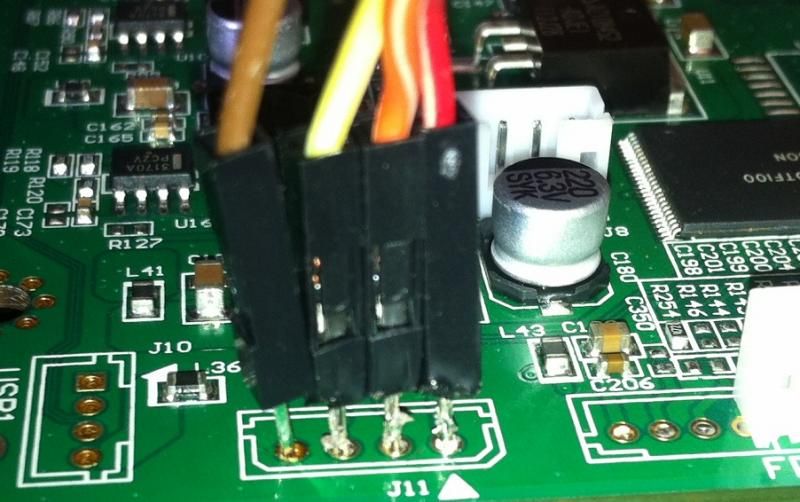
I used 2.54mm 1pin 1p-1p Female to Male jumper wire this has a hard pin at one end to solder to the jtag points and the correct socket at the other end to connect to the cypress
board.
The method i used to solder these in place was simple to hold and heat with the solder iron the pin from the 2.54mm 1pin 1p-1p Female to Male jumper wire, doing this then heat's the
solder on the board and the pin simply slips in as the solder goes molten.
Try as i did i could not get this to work at all on Windows 7 so i used a old Windows XP PC which worked fine.
1: Install Broadcom Studio 3 (See Attached Files)
2: Install Bcm97358.msi
3: Install NETFRAMEWORK 3.5 THEN NET FRAMEWORK 4
4: Remove the single jumper from the Cypress board and plug the Cypress board in to a USB port.
5: Your PC should now start to install the Broadcom Test Adapter.
At this point choose the option install automatically, the driver will then install upon completion you'll need to reboot your PC.
After the reboot the above wizard appears again only it says.
This wizard helps you install software for: Broadcom Test Adapter.
Follow the wizard again using install automatically and after the wizard is done you are ready installing.
Drivers for the Cypress board (Broadcom studio 3 wil now know the cypress board).
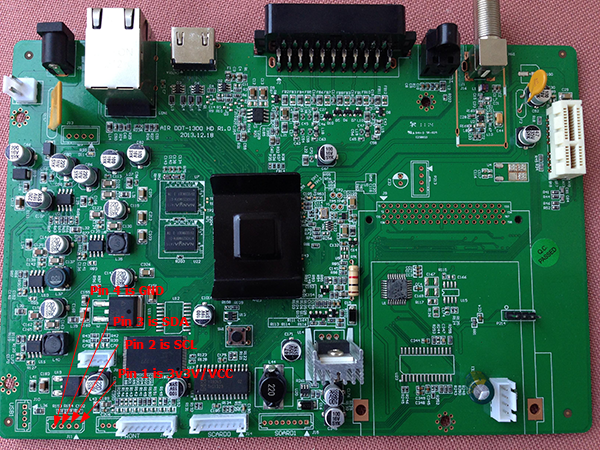
6. Now we need to make a cable between the cypress board and the CLOUD IBOX 3. The pinouts below are from the Cloud Ibox to the Cypress board.
Pin 1 is 3v3V (Red Wire)
Pin 2 is SCL
Pin 3 is SDA
Pin 4 is GND
7: Connect the cable between the cypress board and the CLOUD IBOX 3
8: Start Broadcom studio 3
9: In the menu select :View => devices => BCM7358
10: turn on the CLOUD IBOX 3 YOU SHOULD SEE CONECTED
11: COPY The 2 flash files TO PROGRAMS/BROADCOM/BROADBAND STUDIO 3/FLASHES.
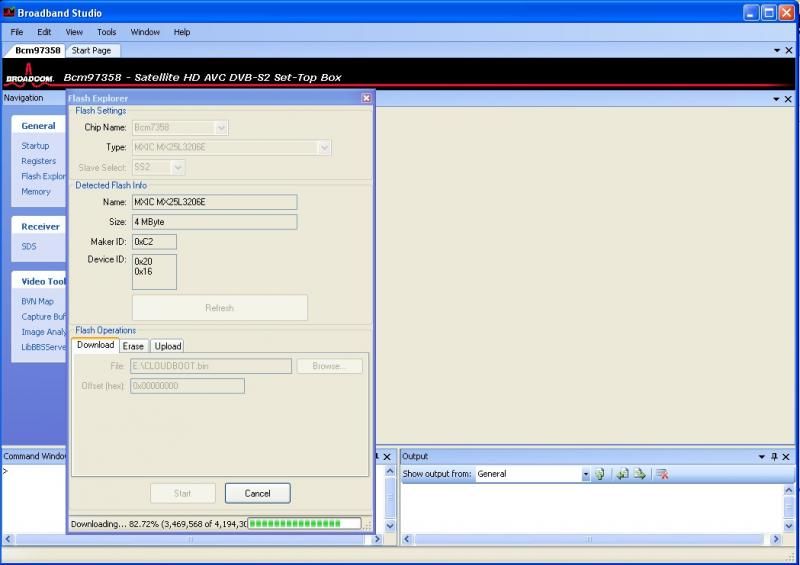
12: Now in the left hand window of BBS Select Flash Explorer
13: Select “MXIC MX25L3206E” in the type field
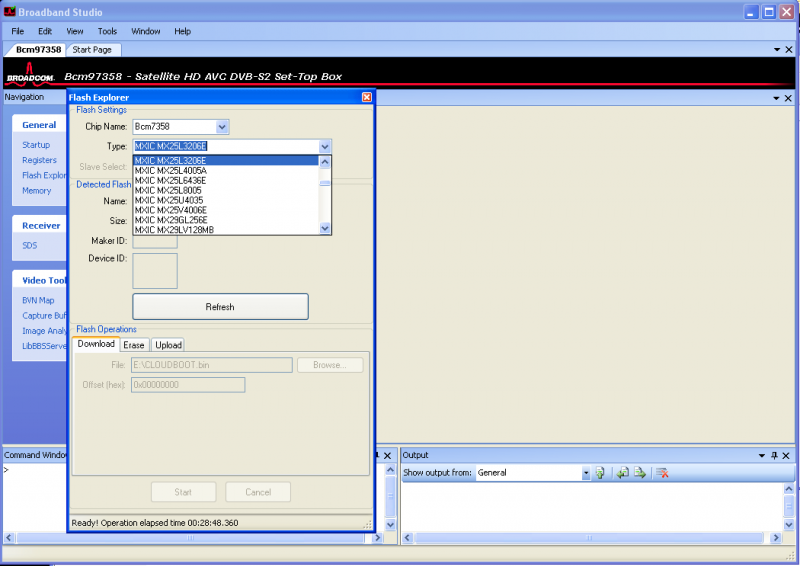
14: Select “Refresh” IF CORRECT CHIP IT SHOULD SHOW DETAIL
15: Select “Browse” and select the file CLOUDBOOT.BIN
16: Select “Start” You should now see that the flash is being programmed to the CLOUD IBOX 2 plus or 3.This can take upto 30 mins but you see the progress on screen.
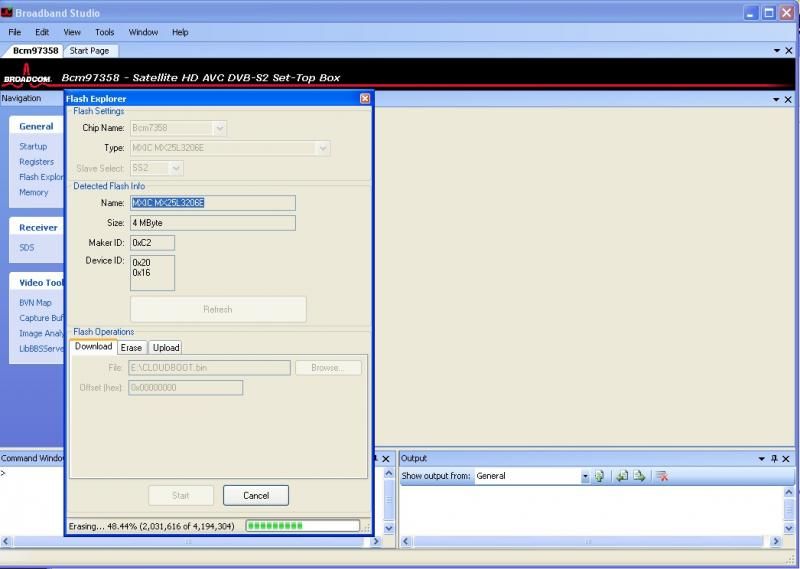
17: After the programming is finished turn off the cloud ibox disconnect the cable to the Cypress board.
18: Now power up the Ibox it should say boot, when it does turn it off.
19 Now on a Fat 32 formatted usb stick transfer the xspeed folder of the image of your choice to the stick.
20: Turn on cloud ibox then let it install image when finished it will say done
reboot box & fingers crossed you will get a working cloud ibox 3
https://www.dropbox.com/s/3998mv9iiwrr8 ... 281%29.zip
Jtag Your IBOX 2 plus & 3
- zmeura
- Site Admin
- Posts: 4516
- Joined: 10 Sep 2013 20:42
Jtag Your IBOX 2 plus & 3
.
"Sa fie bine ca sa nu fie rau"
- niculae22
- New member
- Posts: 9
- Joined: 16 Jan 2014 09:14
Re: Jtag Your IBOX 2 plus & 3
Cu tot respectu': interfata nu e accesibila oricui (e costisitoare,asemenea ICE pt ALI) si trebuia sa postezi sursa "de inspiratie" http://www.cloud-ibox3.com/index.php?topic=351.0 succese...
- zmeura
- Site Admin
- Posts: 4516
- Joined: 10 Sep 2013 20:42
Re: Jtag Your IBOX 2 plus & 3
Daca zici ca "trebuie" e ok. Altfel sa ma dea in judecata ca oricum nu de acolo am facut copy-paste.
PS: Poate cu banii de pe clone isi cumpara si ei un server calumea ca ala e mort. Cel putin mie nu imi merge.
.
"Sa fie bine ca sa nu fie rau"
- allsattnt
- Standard User
- Posts: 237
- Joined: 07 Dec 2014 19:15
Re: Jtag Your IBOX 2 plus & 3
Mi-am comandat o placa EZ-USB FX2LP CY7C68013A USB de pe amazon,iar cand a venit am zis sa ma joc putin pe Cloudibox2plus(neavand nimic pe front display cu ultimul bootloader, a fost un motiv in plus).
Am instalat Broadband Studio 3 pe laptop, am copiat in "ProgramFiles/Broadcom/Broadband Studio 3/Flashes" cele doua fisiere din "broadband/Flashes" din fisierul descarcat.
Am facut lipiturile pe placa receptor si pe EZ-USB FX2LP CY7C68013A USB.
Pin 1 la 3v3V
Pin 2 la SCL
Pin 3 la SDA
Pin 4 la GND
Am scos jumperul de pe placa EZ-USB FX2LP CY7C68013A USB si pornita aceasta din butonul de pe ea.
Am legat la laptop.
S-au instalat toate driverele.
Am pornit Broadband Studio 3.
La View => devices am selectat BCM7358.
Pornit Cloudibox2plus din butonul din spate.
Acum apare "connected".
In partea din stanga a Broadband Studio 3 avem “Flash Explorer" ,dam click pe el,apare o fereastra unde selectam:MXIC MX25L3206E.
Dam "Refresh".
Daca e ok putem adauga la "Browse" fisierul din atasament :"CLOUDBOOT.BIN".
"Start"
Asteptam in jur de 26 minute.
Oprim receptorul,scoatem firele,pornim receptorul,automat va apare "boot" apoi oprim receptorul.
Putem pune pe stick orice imagine(chiar si ultimul backup ce-l avem),incarcam in receptor.
Dupa pornire vom avea ok front display-ul.
In cazul unei imagini mai noi pusa pe rec, va trebui pus dupa aceea bootloaderul:"Cloud-IBox_2+_BootLoader_751_MHz_17.05.2014" pe un stick pentru a putea folosi telecomanda.
Sper ca v-a fost de ajutor.
Enjoy.
https://mega.nz/#!Zt8zTTzC!XhGg4xzbEbAT ... ZZJgNYN8OY
E prima data cand traiesc,asa ca e omeneste sa mai si gresesc!
Who is online
Users browsing this forum: No registered users and 1 guest